Get Your Helmet Brim Fitting Right: A No-Nonsense Guide for Sun Safety
Stop squinting and start protecting. This guide shows you exactly how to fit your helmet brim for maximum sun protection and comfort, especially here in Australia's harsh UV.
Get Your Helmet Brim Fitting Right: A No-Nonsense Guide for Sun Safety
The Australian sun. We love it, but let's be honest, it can be brutal. Whether you're on a bike, a worksite, or out on the water, protecting your face from relentless UV rays is crucial. And one of the simplest, most effective ways to do that is with a properly fitted helmet brim. Forget the floppy hats that fly off or the bulky sunshades that obscure your vision. A well-attached helmet brim is your first line of defence against glare and sunburn.
But how do you make sure it's actually working? A loosely attached or poorly positioned brim is about as useful as a chocolate teapot. This guide cuts through the fluff and gives you practical, actionable steps to achieve the perfect fit every single time. We’re talking about real protection, in real Australian conditions, where the UV index can soar faster than you can say "sunburn."
Why Does Brim Fit Matter So Much?
It’s not just about looking good (though a well-fitting brim does that too). Proper brim placement is about maximising coverage and minimising your exposure to harmful UV radiation. Think about it:
Direct Sun Blockage: A brim positioned correctly shields your eyes and forehead from direct sunlight, reducing squinting and eye strain. This is especially important on long days under the heat, common across much of Australia.
Reduced Glare: Sunlight bouncing off surfaces can be just as blinding as direct rays. A brim helps cut down on this reflected glare, improving your visibility and safety.
Forehead and Nose Protection: The skin on your face, particularly your forehead and nose, is highly susceptible to sunburn. A well-fitted brim provides a vital shadow, preventing painful burns and long-term skin damage.
Comfort: When your brim is positioned correctly, it feels like part of your helmet, not an annoying add-on. It doesn’t obstruct your vision or feel like it’s about to fall off. This is key for any activity that requires focus and concentration.
Common Objections – And Why They Don’t Hold Up
“It’s just a bit of plastic, how much difference can the fit make?”
A huge difference. Think of it like wearing sunglasses. If they’re slipping down your nose or too small, they’re not doing their job effectively. The same applies to a helmet brim. The angle and position determine how much of your face is actually in shadow.
“They’re all fiddly to attach, I don’t have time for that.”
We get it. Time is precious, especially when you’re trying to get out there. That’s why we’ve focused on making our products easy to install. A minute or two spent on getting the fit right saves you hours of discomfort and potential sunburn later. Check out our How to Install guide for a quick rundown.
“My helmet already has a small brim/visor.”
Many helmets offer some level of sun protection, but it’s often minimal. In the intense Australian sun, especially during summer with its long daylight hours and peak UV, minimal isn't enough. An additional, well-placed brim provides that crucial extra layer of coverage. A quick look at the UV index on any given summer day will tell you our conditions demand more.
The Ideal Brim Fit: What You’re Aiming For
Before we dive into the steps, let's define what “proper fit” looks like. You want the brim to:
Cast a shadow over your eyes when you look straight ahead.
Not obscure your upward vision significantly.
Be secure and not wobble or detach easily.
Sit comfortably without causing pressure points.
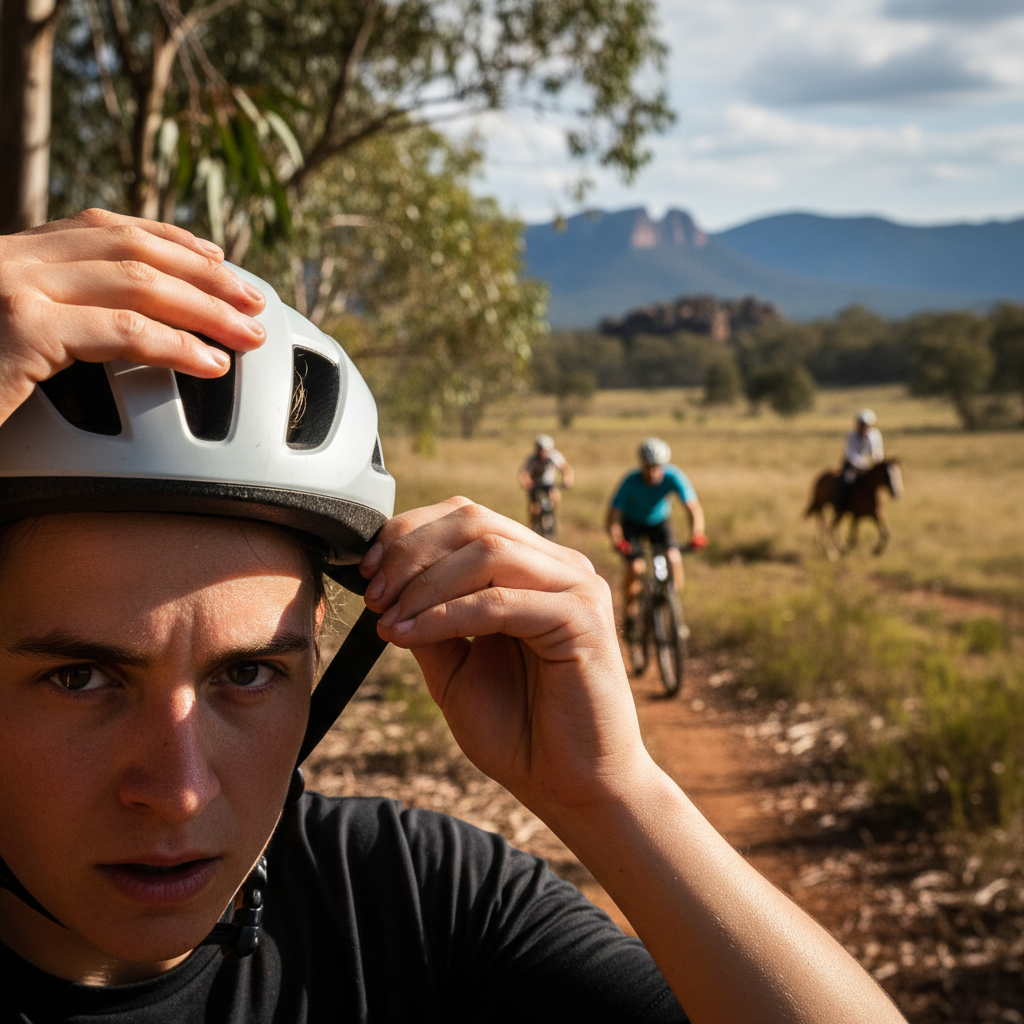
Step-by-Step Guide: Fitting Your Helmet Brim
This guide assumes you have a helmet accessory brim designed to attach to your existing helmet. While specific attachment mechanisms can vary, the principles of positioning and securing are universal. For our specific products, you can find detailed installation instructions on our How to Install page.
Step 1: Gather Your Gear and Prep Your Helmet
Your Helmet: Make sure it's clean and dry.
Your Helmet Brim: Ensure it’s the correct model for your helmet type (e.g., cycling, construction, equestrian).
Attachment Hardware: Depending on the brim, this might be Velcro straps, clips, or a specific mounting system.
A Mirror (Optional but Recommended): This helps you see what you’re doing and judge the positioning from your perspective.
Good Lighting: Natural light is best to accurately judge shadows.
Step 2: Initial Attachment – Don’t Tighten Fully Yet
Follow the manufacturer’s instructions for attaching the brim. For clip-on or strap-based systems, loosely secure the brim to your helmet. The goal here is to get it in the general vicinity. Don't worry about perfect alignment just yet. If your brim uses a system like ours, you'll typically attach the base to the helmet first, which then allows the brim to clip on.
Step 3: The Critical Positioning – Finding the Sweet Spot
This is where the real work happens. Put the helmet on your head. You want to find the angle that provides the best shade without hindering your vision.
Look Straight Ahead: With the helmet on and the brim loosely attached, look straight into the distance. The brim should be positioned such that it casts a shadow directly over your eyes and the upper part of your nose.
Check Your Upper Vision: Tilt your head up slightly. Does the brim severely block your view? You need to be able to see obstacles or signals when necessary, particularly crucial in traffic or on a worksite. For most Australian conditions, you’ll want more shading, so err on the side of a lower angle if possible, but always balance it with visibility.
Check Your Lower Vision: Look down. Does the brim interfere with your ability to see your feet or the ground immediately in front of you? This might be less critical for some activities than others, but it’s worth noting.
Adjust the Angle: Most helmet brims allow for some degree of tilt. Gently adjust the brim up or down, or reposition it front-to-back, until you find that sweet spot. This often involves a slight tilt downwards. Think of it as creating a personal shaded zone for your face.
Step 4: Secure the Brim Tightly
Once you’ve found the perfect position where the brim effectively shades your eyes without compromising your essential vision, it's time to secure it.
Tighten Straps/Clips: Firmly tighten any straps, clips, or fasteners to lock the brim into its desired position. Make sure they are snug and won't slip.
Check for Wobble: Gently try to wiggle the brim. It should feel solid and integrated with the helmet, not loose or prone to shifting. If it moves easily, then the attachment isn't secure enough. Australian weather can be windy, and you don't want your brim becoming a projectile.
Step 5: The Final Check – Real-World Conditions
To truly confirm your fit, test it in the environment you’ll be using it.
Simulate Sunlight: If possible, stand in direct sunlight and look straight ahead. Check if your eyes are comfortably shaded. Then, look up and down to ensure your vision is still adequate for your activity.
Wear It for a Short Period: Wear the helmet with the brim for 5-10 minutes. Does it feel comfortable? Are there any areas of pressure? Does it stay in place as you move your head slightly?
Maintenance and Adjustment
Over time, straps can loosen, or you might find you need a slightly different angle depending on the time of day or the intensity of the sun. Regularly check the security of your brim, especially after any impacts or rough handling. If you find yourself constantly adjusting it, it's a sign that the initial fit assessment needs a revisit.
Check Attachment Points: Ensure any Velcro, clips, or screws are clean and securely fastened.
Re-evaluate Angle: If you're experiencing more glare than usual, try adjusting the brim angle slightly lower.
Choosing the Right Brim for Your Needs
Not all brims are created equal, and what works for one activity might not be ideal for another. We offer a range of Products designed to integrate seamlessly with various helmet types, offering robust sun protection tailored for Australian conditions. Whether you need maximum shade for long days in the saddle or a more streamlined profile for a worksite, there’s a solution. Remember to consider the unique demands of the Australian environment – the intense UV, the long daylight hours of summer, and the often unforgiving heat.
When to Seek Further Help
If you’ve followed these steps and are still struggling to get a comfortable, secure, and effective fit, or if you have questions about compatibility with your specific helmet, don’t hesitate to consult our FAQ section. We also have dedicated articles and guides on our Blog covering various aspects of helmet care and sun safety. Our goal is to ensure you’re protected, no matter what your outdoor pursuit.
Summary Checklist
To make things easy, here’s a quick checklist for a perfect brim fit:
[ ] Helmet and brim clean and dry.
[ ] Brim initially attached loosely.
[ ] Look straight ahead: Brim shades eyes and upper nose.
[ ] Look up: Vision is not excessively blocked.
[ ] Look down: Adequate ground visibility.
[ ] Brim angle adjusted for optimal shade without compromising vision.
[ ] All fasteners tightened securely.
[ ] Brim is solid and does not wobble.
- [ ] Tested in direct sunlight (if possible).
Don't let the sun dictate your comfort or safety. A properly fitted helmet brim is a simple, effective way to significantly enhance your protection. Spend a few extra minutes getting the fit right, and enjoy the outdoors with confidence. Browse our Products to find the perfect brim for your helmet and say goodbye to squinting.